Projects
A Project on the City Innovate platform offers a wide range of options for managing your document lifecycle, from a simple Document Builder stage to complex multi-stage builds. You will have the option of simply having a Document Builder stage, adding publication stages, evaluation stages, etc. The world is your oyster!
The quick video below will provide you insight on where to start creating your Project, and the overview thereafter will assist you in understanding more specific management options for your projects from creation to completion. Let's jump right in!
Creating a New Project
Steps for creating a new Project:
- Click "Add New Project"
- Select an appropriate workflow
- Designating an owner for the project (if not yourself)
- Input inclusion criteria (category, type, etc)
- Add collaborators as needed
- Click "Create Solicitation"
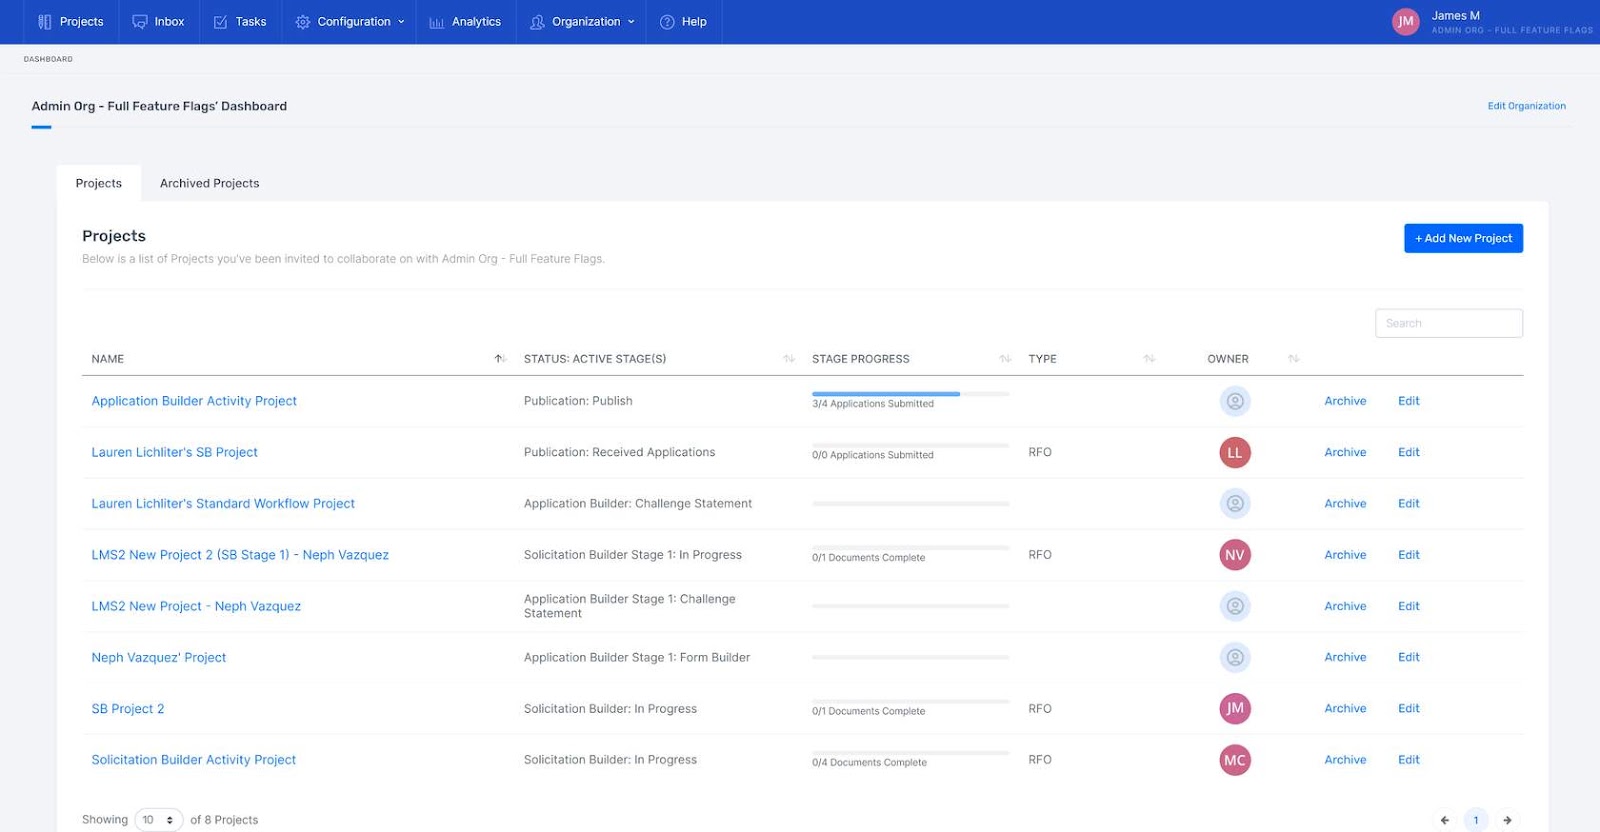
You will then be brought to the Project page of the newly created project. You can always find your project in the Project panel of the Projects page, shown below
Project Details Options
Selecting Attributes and Adding Collaborators
To create a new Project from scratch, go to the Projects page and click "Add New Project". The system will then prompt you to give the Project a name and make selections for various attributes such as type, purchase class, etc. To learn more about document categories/types, refer to this article.

Available attributes are dependent on how your organization has configured its categories and types.
In the configuration screen for your new project, you will notice that you have automatically been assigned the role of Owner by default. You can then invite Collaborators as Editors / Contributors / Reviewers / Viewers in the lower portion of the page
You will need to enter the names of any collaborators you want to invite. The name of the user should appear as you begin to type in each field. If you want to invite someone not currently in the system, click the 'Invite a New User' link. Enter the individual’s name and email in the pop-up window then click 'Create Invitation'. The system will send an invitation email and automatically grant the new user the necessary permissions for the solicitation. When finished, click 'Create Solicitation'.
Completing the Questionnaire
Depending on the combination of attributes selected, you will be presented with a series of additional questions to help Solicitation Builder assemble the correct document templates and pre-populate them with key information.
While some questions require an answer to continue, others will let you skip to the next question, or assign the question to another user. To answer a question later, select “Skip for Now” or “Don’t Know?” to assign the question to another team member within your project.

Editing Documents and Settings
Once you are done with the questionnaire, Solicitation Builder will create the project with an initial set of documents, which you will need to edit to reflect the specifics of your solicitation. You might also need to answer additional questions to populate all of the documents with information. To see a list of documents associated with a solicitation, select the solicitation from the Solicitations page then navigate to the Documents panel.
Project Headers/Footers
Headers and Footers can help your reader navigate your documents. Headers and footers can contain information such as the project number, release date, name of the purchasing agency, page numbers, and anything else that might be helpful to readers.
Rules

Formatting Rules:
- The Header/Footer area fits 3 lines of text by default. If more than 3 lines of text are added to a header/footer, space will be allocated from the document’s body to accommodate the header text.
- Users can choose 1, 2, or 3 columns for headers/footers. Writing in 12pt size font, 1 column fits 82 characters per line; 2 columns fit 41 characters per line; and 3 columns fit 20 characters per line.
- You can choose font sizes size 6pt to size 36pt font.
- Header/Footer does not print on table of contents pages.
- After documents are exported to PDF, the variables $page_number and $total_pages are replaced with page numbers.
1. Create/Edit header/footer
- Open Project
- Go to the Header and Footer substage in the left hand menu
- Click Add New Header & Footer or Edit existing
- If New, name your Header & Footer
- Write and format
- Select how many columns you wish to use
- Input text or image contents into the available fields
- Click "Create Header & Footer " or "Save" if editing existing record
- Go to Documents in the left hand menu
- Find the 1st document you want to apply the header to, click Edit on its corresponding row to open Document Settings
- Select your Header & Footer Template and save
- Repeat for all documents in your list
2. Complete a missing question response
If you see text in your headers {{Missing Question Response}}, that means a question is awaiting your response. Go to your project's Questions, answer the corresponding question, then save. Your response will automatically apply to your document headers/footers.
See video demonstration:
Action Center
After you have created a new project, the action center on your solicitation details page will be in heavy use. The Action Center is a list of clickable links and buttons. Let's discuss their functions below:
After you have created a new project, the action center on your details page will provide numerous options to Project Owners and Editors. The Action Center is a list of clickable links and buttons. Let's discuss their functions below:
- Export Solicitation PDF - Allows you to export the entirety, or portions, of your project to PDF; along with allowing you to change the Status of your record, if it has advanced beyond "in progress".
- Export Solicitation DOCS - Allows you to export the entirety, or portions, of your project to DOCX; along with allowing you to change the Status of your record, if it has advanced beyond "in progress".
- Edit Solicitation Details - Allows you to modify the title, category, type, and collaborators for your project
- Track changes for everyone - Applies Track Changes globally for the entire project, ensuring that all users have their additions and subtractions requiring approval from Project Owners or Editors.
- Accept all changes - Will accept all changes made outside of edits to sections.
- Resolve all comments - Will check off all comments in the project, effectively removing them from view and further engagement within the project.
- Save Current Version - Saves the current build of every section of your Project at that point in time, ensuring there is a snapshot of the current state; this is especially useful prior to a heavy session of accepting/rejecting tracked changes.
- Run Accessibility Check - will run ADA checks against the entirety of your project and supply feedback and recommended actions for resolving the accessibility issues encountered in your document's formatting.
- Create summary of changes - generates a document that harbors a link to compile all unaccepted tracked changes. This is especially useful to generate after rejecting tracked changes throughout your document, but prior to accepting tracked changes in full; as once changes are accepted they will not populate in the summary of changes document.
- Change Solicitation Status - Adjusts the status of your project to reflect advances from In Progress to: Under Review, Published, Addendum, Contracting, Completed, and Archived.
Project Stages
Administrators are the only users that can configure Workflows with Project Stages, which define the lifecycle of a Project. When you create a new Project, you will have the option of selecting a workflow that best reflects your needs for the Project. Although an Admin will be responsible for creating workflows, some users will be able to choose an appropriate workflow when creating a new project. Types of Projects Stages include, but are not limited to:
- Solicitation Builder
- Publication
- Evaluation
- Application Builder
- Project Oversight
Staff users can, however, manage Project Stages if needed in a Project that has already been created. We'll see how that is handled below in a section titled "How to Edit Project Stages".
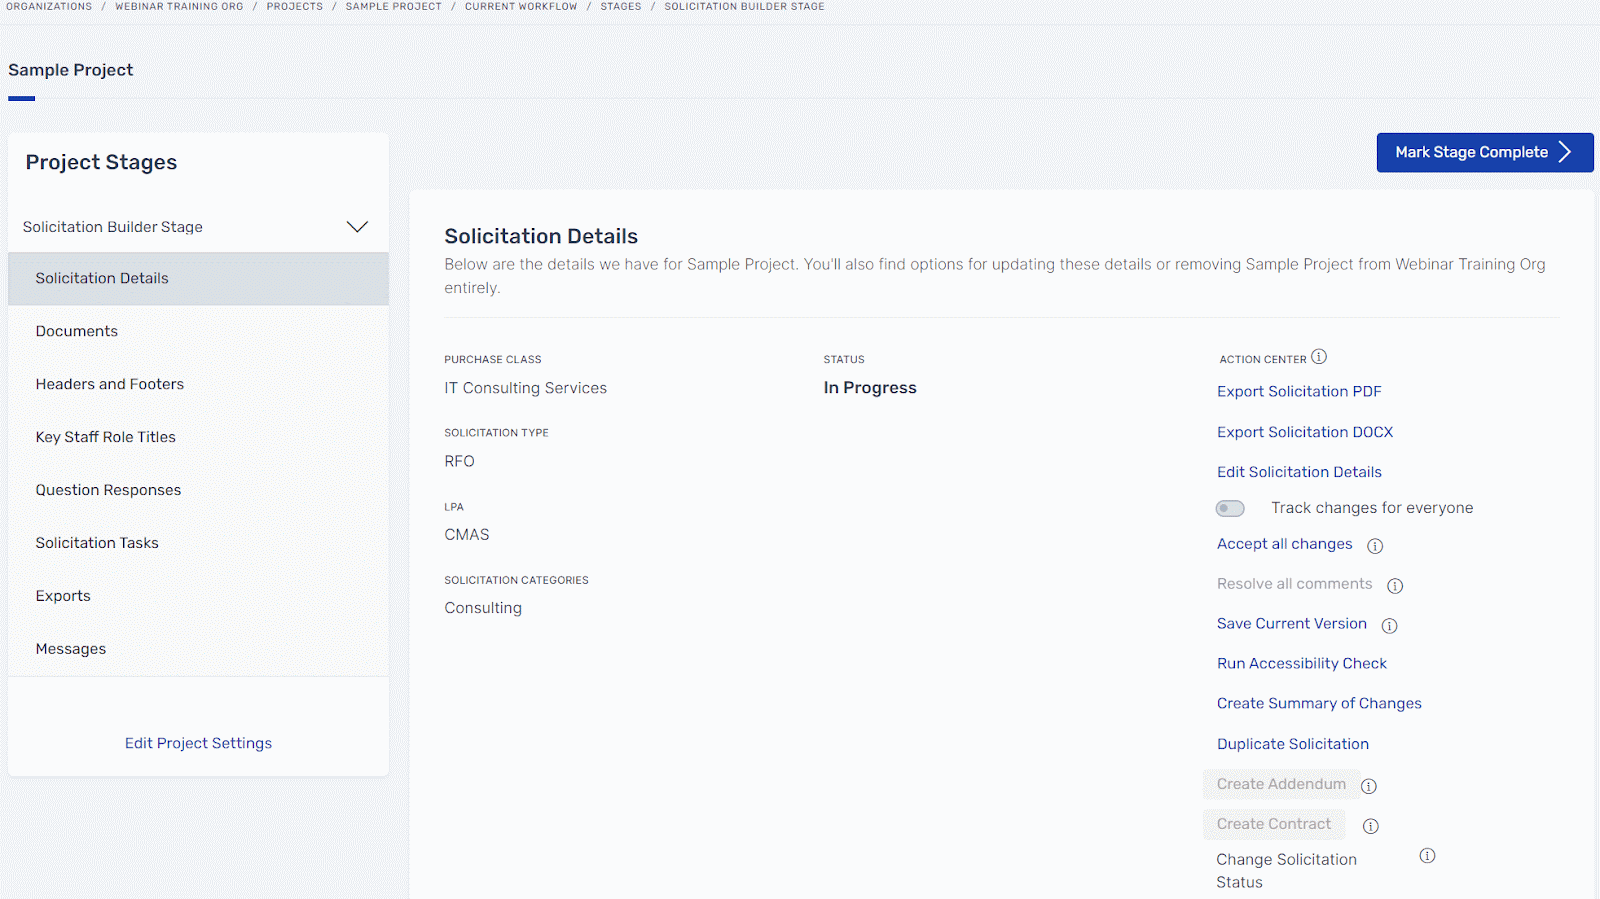
Solicitation Builder Stage
From the left-hand navigation panel, you can quickly navigate to different parts of your Project. Most Projects in Document Builder will start with a Solicitation Builder initial stage:
The Action Center, on the right, is a list of clickable links and buttons where you can perform these ten actions (detailed in the above 'Action Center' section):
- Export Solicitation PDF
- Export Solicitation DOCX
- Edit Solicitation Details
- Track changes for everyone
- Accept all changes
- Resolve all comments
- Save Current Version
- Run Accessibility Check
- Create summary of changes
- Change Solicitation Status
You'll also notice a list of team members with access to the solicitation and their designated roles as well as information pertaining to the solicitation like purchasing class, etc.

Guest Viewers, Reviewers, and Contributors will not have access to the Action Center.
Publication Stage
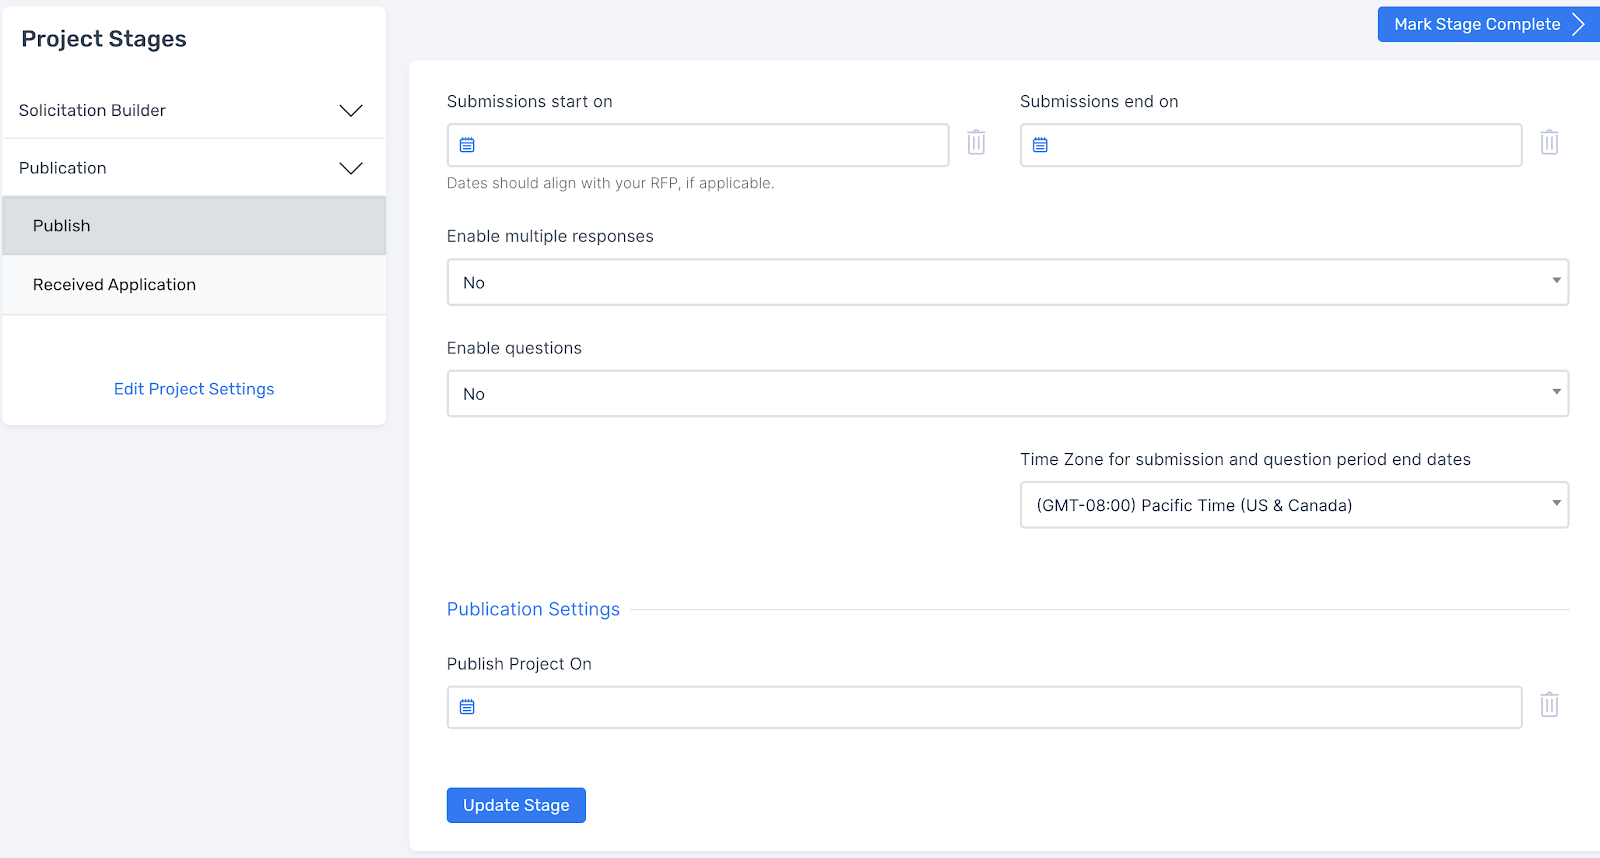
The publication stage allows you to publicly publish the details of your project and begin accepting application submissions. When you publish the project, the system will generate a unique url for you to share with your respondents. If you started with the document builder stage, you will have the option of creating form fields within your documents for the respondents to respond to and later evaluate.
Administrators and Project Owners will receive an email each time there is a new submission to a project.
Evaluation Stage
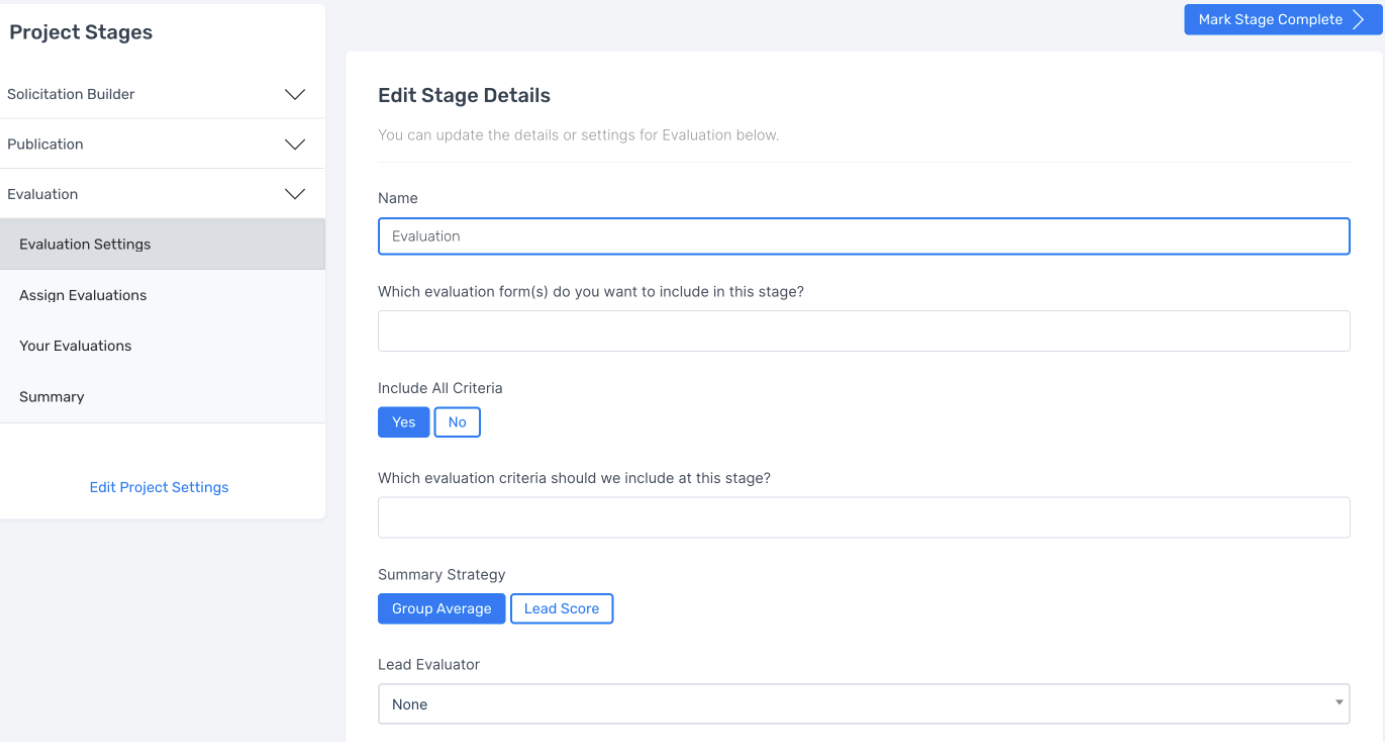
This stage allows your team to collaboratively evaluate and score the submissions from the publication stage.
Users will receive an email each time they are assigned a new submission to evaluate.
Project Oversight Stage
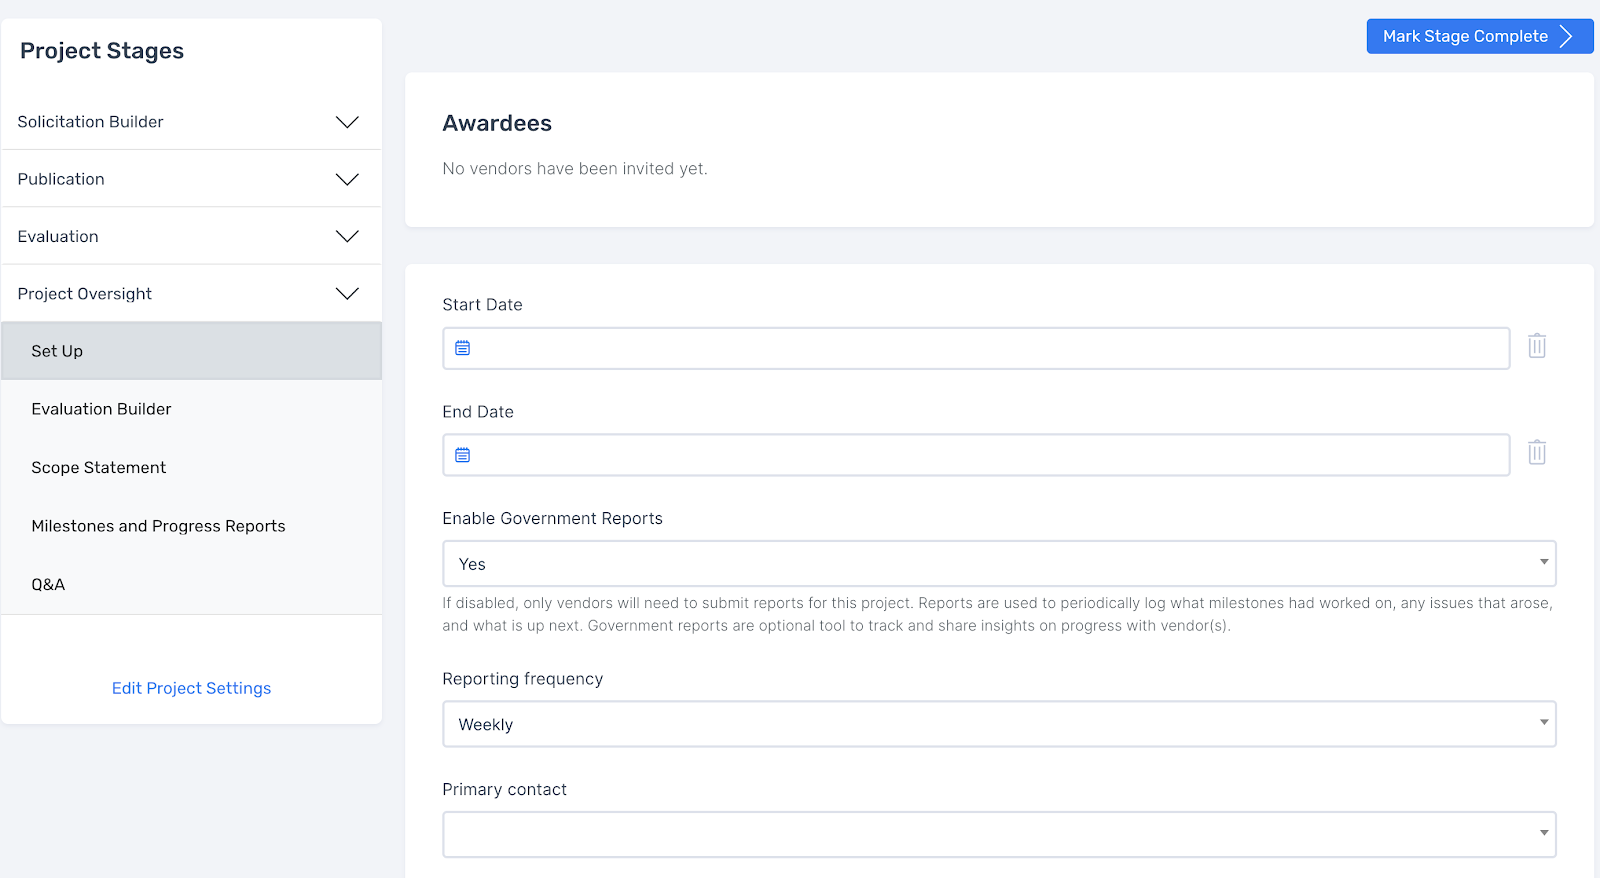
This stage is used to build define milestones and collaborate directly with your respondents. How and if you use this stage will vary dependent on your needs.
Application Builder Stage
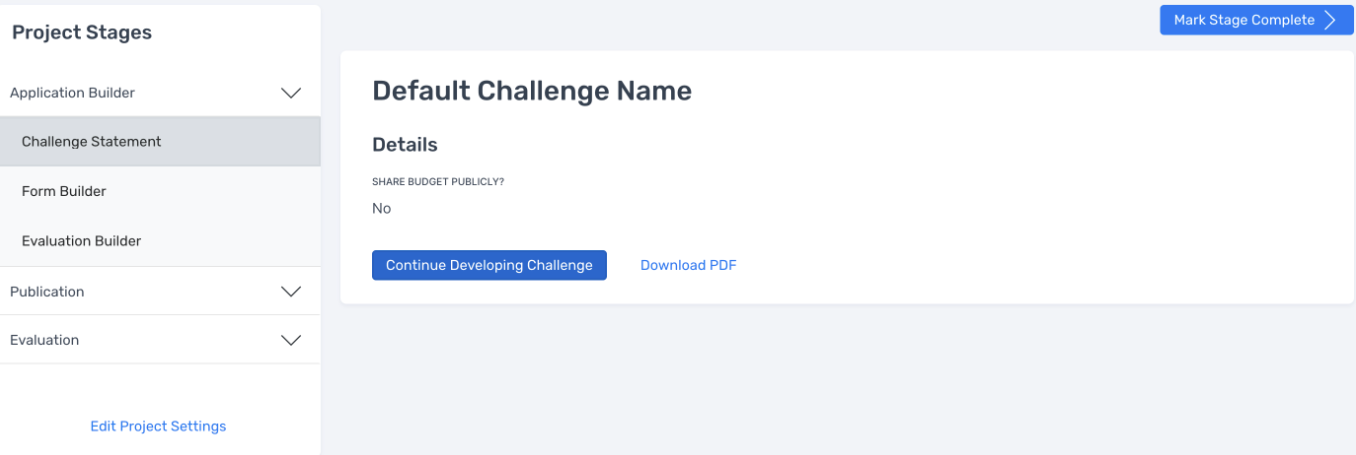
This stage is used for creating projects with the intent to publish and accept application submissions, typically for RFI or Market Research purposes; these projects do not hinge upon a Document Builder project stage and need to be configured freshly each time they are created.
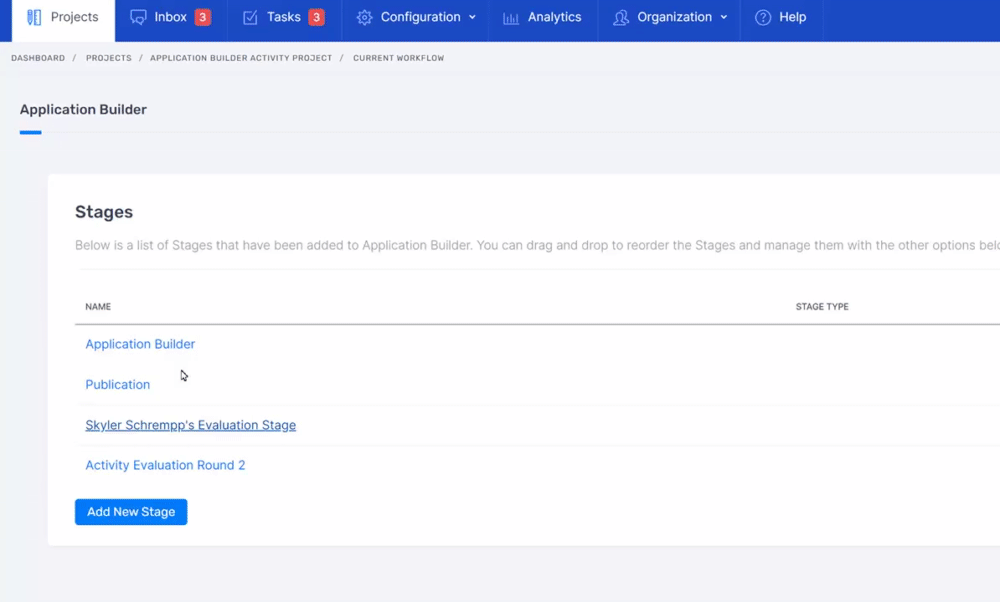
How to edit project stages
Open the project and edit the project settings from the Project Stages panel.
From the Stage panel you can delete a stage, edit a stage, and add a new stage.
You can also rearrange stages by dragging and dropping them in the desired order.
Permissions for Project Stages
Team Administrators have the permissions to fully manage their teams when using Document Builder which include the various project stages. The first step is inviting the person to your organization as explained above. A user will not have a role within a project until they create or get invited to one. A user may have different roles for different projects. Let's go into detail below:
- Owners = Can view, edit and delete all items within solicitation including archiving the solicitation itself.
- Editors = Can view, edit and delete all items within solicitation. Cannot archive solicitation.
- Guest Contributor = View-only permissions; Can edit sections only when a document's permissions are updated to allow GC's. Can request to unlock any documents or sections.
- Reviewer = Can comment and make tracked changes on all document sections in a solicitation.
- Guest Viewer = View-only permissions; cannot make comments, track changes, or author new content.
Project Roles are assigned when you create them within a new solicitation. After a solicitation is created, roles can be changed by Administrators, Owners and Editors by selecting 'Edit Solicitation Details' in the action center.
Here's a video on how to granularly control permissions for other project stages beyond the Solicitation Builder stage (please note the video has no audio)
The list of people that populate as a contributor will only be those who have been invited to your organization. If you have not already, please invite new team members and have them set up an account.
Procurement Staff have the permissions to fully manage their teams when using Document Builder which include the various project stages only for projects that they create. Team Administrators can designate procurement officers to the role of Owner to any project at any time.
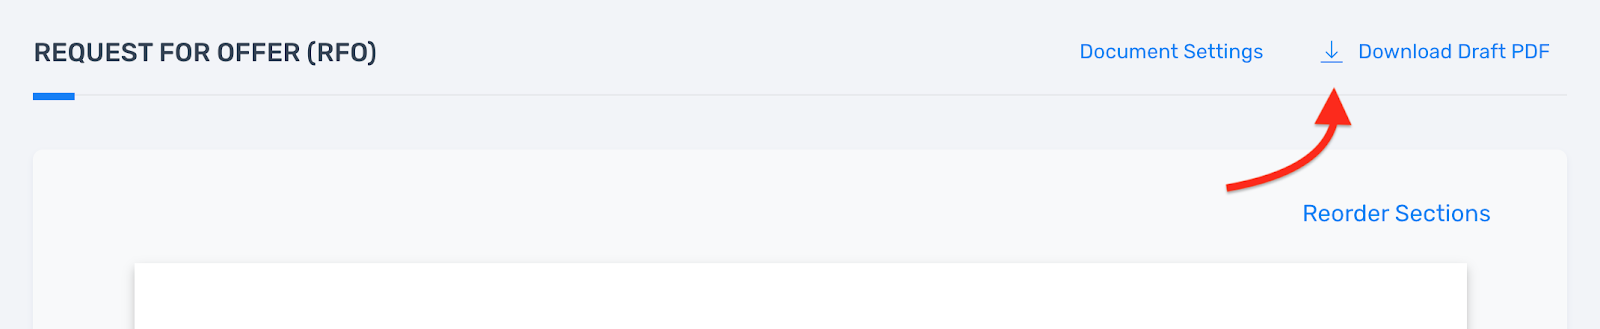
Downloading Individual Documents
All users can download documents from Document Builder at any time. To download a document:
- Open the project
- Open the document you want to download
- In the top right corner above the document, click 'Download Draft PDF'.
- The system will create a PDF and download it to your web browser's default location.
Exporting Entire Projects
Administrators, Owners / Editors can export projects. This feature allows users to:
- Create and download zip folders of documents
- Options to download all or specific documents
- Choose the purpose of your export: draft, published, addendum, or contracting
To export a Project:
- Open your Project
- In the Action Center, click 'Export Solicitation PDF'
- On the export page, fill in the desired details then click 'Create Export'
- You will be taken back to your project dashboard with a blue banner that hyperlinks to your Exports for the Project, where you will find all exported records numbered and dated. You can download a zip file or the master document file of your chosen export.
Please be advised that exporting a solicitation WILL NOT jeopardize or corrupt the project.
You can delete exports in the Export panel, however this process is not reversible.
Export Checklist
Here is a list of recommended steps to ensure your documents are complete with no or minimal errors.
- Check for document completeness-
- Export draft, or view sections in DB
- Read all documents and sections
- Identify and fix any formatting
- Mark sections and documents as “complete” to guard them from further edits
- Check for ADA compliance
- Run ADA compliance check
- Fix any flagged issues if needed
- Complete tasks
- Mark off completed tasks
- Follow-up on any outstanding tasks
- Final quality assurance
- Export 2nd draft
- Review for completeness
- Export Final Version
- Complete!
Project and Solicitation Status Definitions
Project Status Definitions
Project status is a high-level overview of where your Project is in its lifecycle. Changing it will affect which tab your project appears in on the Project Dashboard: Active, Completed, or Archived.
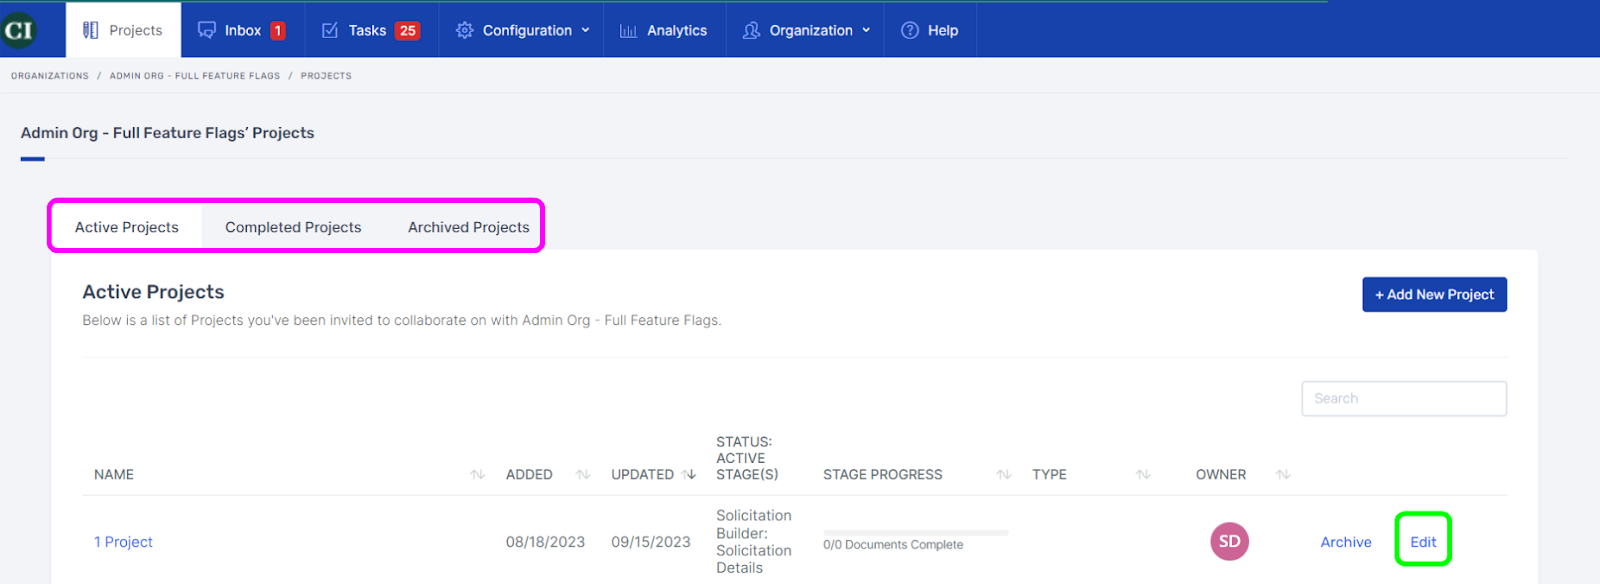
In order to modify the Project Status, click on the Edit button on the far right of the Project's row (encircled in green in the above screenshot)
Once you have entered the Edit view for Project status, you will have 3 options to select from to adjust the Status of your project (detailed below)
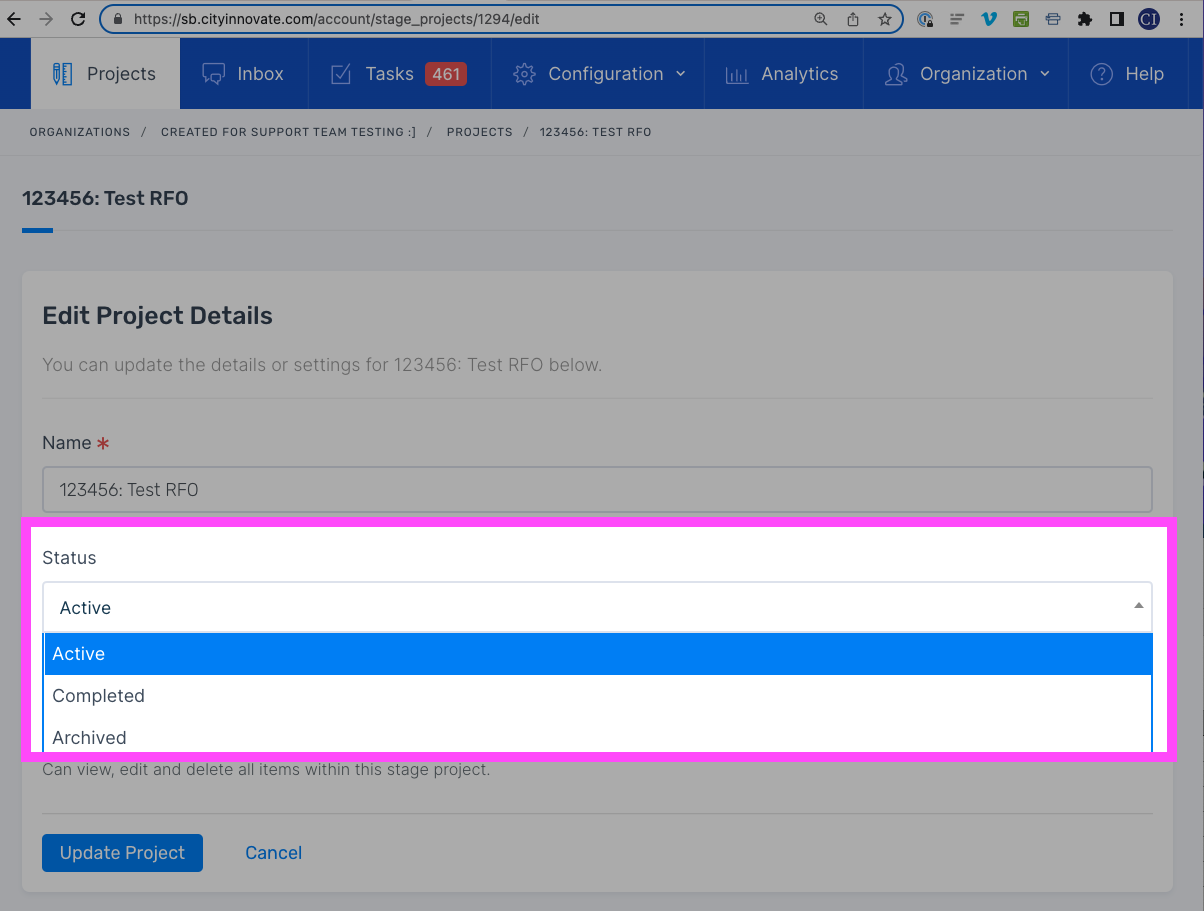
- Active: Project is currently being worked on by your team, progressing through its paces/lifecycle and requiring regular access. All new projects are set to the status Active.
- Complete: Project has gone through its lifecycle, and is highly unlikely to be returned to for any additional work. This will move the project to the Completed Projects tab on the Projects page.
- Archived: Project has gone through it's lifecycle, and has been determined to no longer need additional work. This will move the project to Archived Projects tab and exclude the project from Analytics.
Video: How to change your project status
- Go to the projects page and find your project
- Click “Edit”
- Select a status from the drop down menu
- Click "Update Project" to save
Solicitation Status Definitions
Solicitation Status differs from Project Status, in that it is a detailed reflection of the specific phase your project is currently at. This allows you to more granularly depict which phase of an Active project you are currently working through.
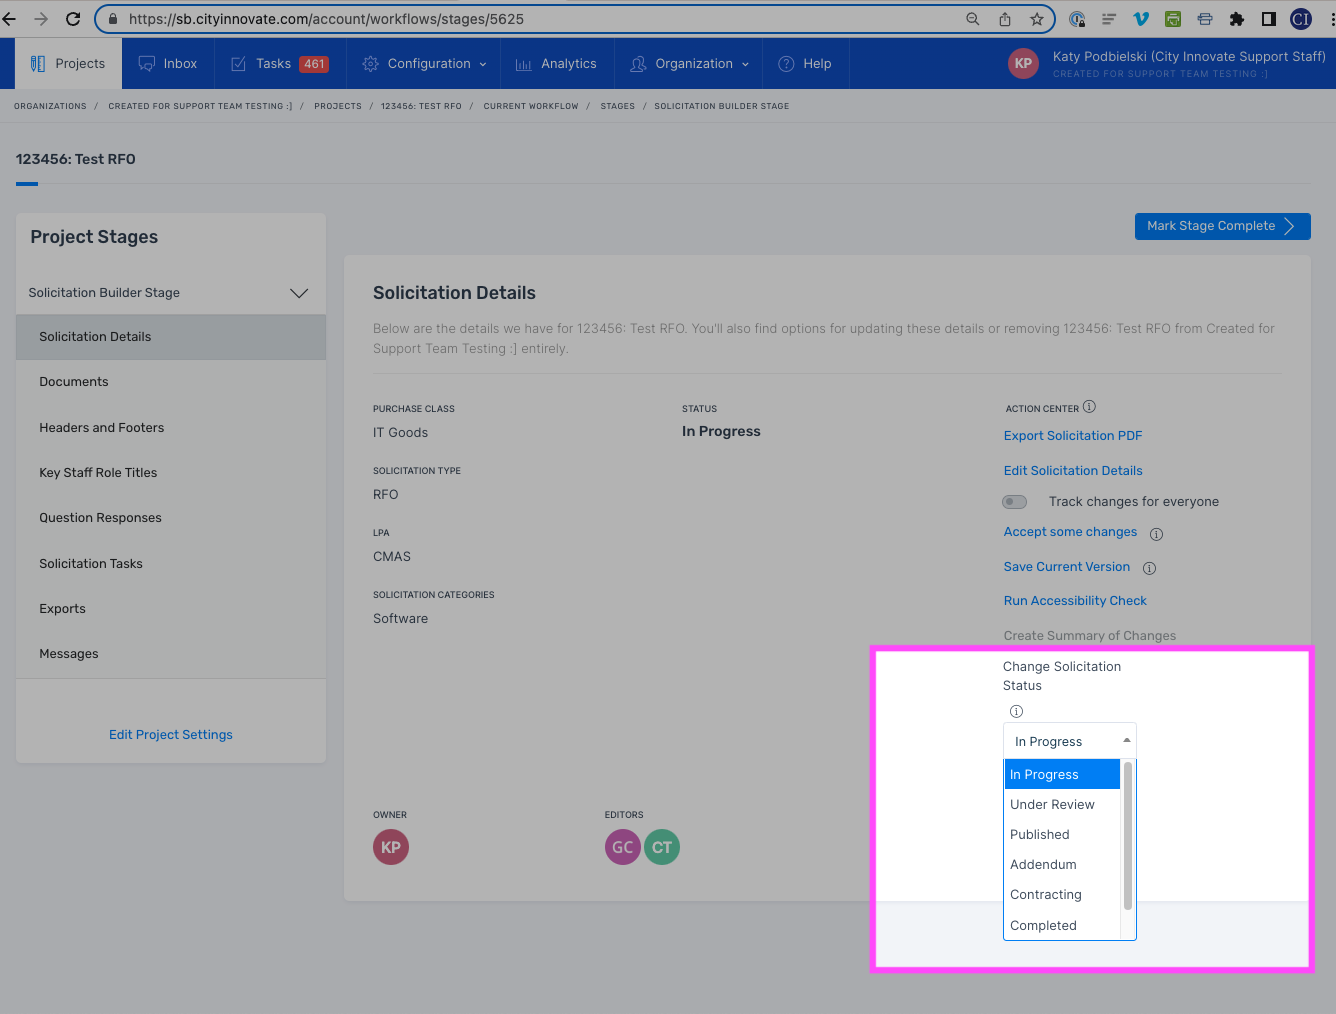
For any projects that have a Solicitation Builder workflow, there are 7 statuses you can set your solicitation to: In Progress, Under Review, Published, Addendum, Contracting, Completed, and Archived.
- All new projects are set to the status In Progress.
- When you reach a milestone after In Progress, you can set the status that represents the next phase you're starting.
- After you sign a contract with a bidder or vendor, you can change the status to Completed.
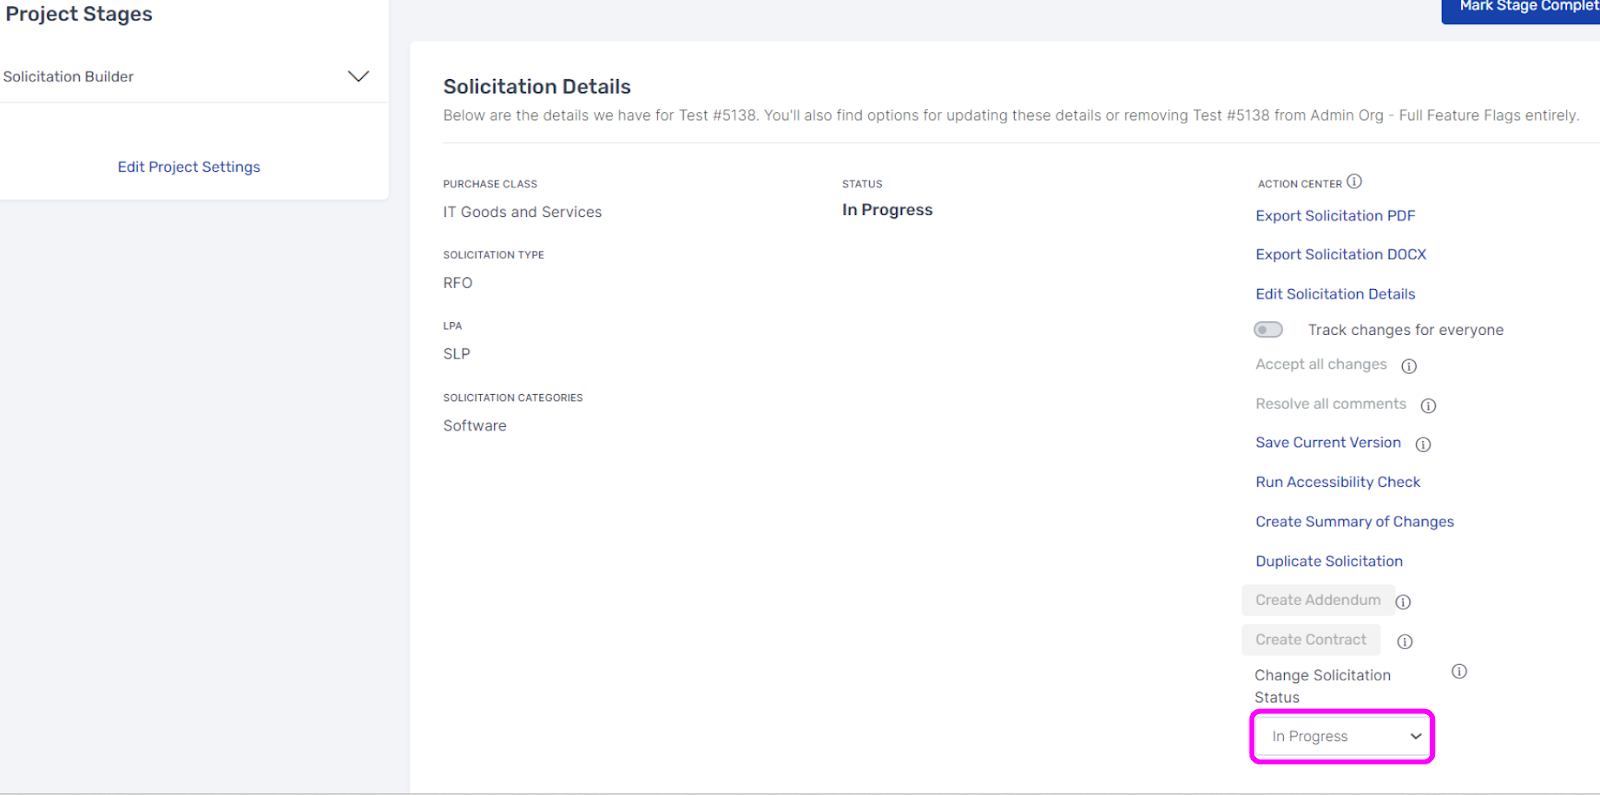
Video: How to change your solicitation status
- Open your Solicitation Builder Project, which lands you on the Solicitation Details page
- Select a status from the drop down menu encircled in the screenshot below
- Select the new status
Archiving Projects
You can manage solicitations that are no longer active by archiving them. Archiving a solicitation adds a project to the Archived Solicitations list and removes it from the solicitation details page. Admins /Owners have the permissions to archive and restore solicitations. Editors can archive the project it has access to and any documents within that project.
To archive a Project:
- Open the project
- Change the status to Archived
- Return to the Project Dashboard
- From the "Active" tab, find the project and select Archive on the far right of the row it's located on
To access and restore archived projects:
- Go to the Projects page
- Click the Archived Projects Tab
- Here you will see a list of all solicitations that were archived.
- Click Edit alongside a project, and under Status select "Active"
- This will return the project to the Active tab on your projects page
Related Articles
Account Roles and Project Roles
Accounts and Account Roles Accounts connect people to the platform. Each person who will be accessing the platform should have 1 account. Account Roles determine a person's access to pages of the platform, as well as permissions to carry out actions. ...How to invite new users
To invite new users to your organization, under the ‘Organization’ dropdown select ‘Organization Members’. On the Organization Members page, click ‘Invite a New Team Member’. Fill in the new team member’s details (the email field is mandatory to ...Tasks
City Innovate helps teams keep track of progress for projects through the use of tasks. Creating and assigning tasks can be help organizations manage the many teams and projects in an efficient and streamlined way. Below we will walk-through the ...Importing and Exporting Documents and Projects
Importing/Converting Word (DOCX) and other Files You can convert uploaded Word files (DOCX) to Document Builder templates or docs for your project(s), as well as import other files as attachments. There are 2 features available depending on the type ...Release Notes
Our platform is updated on a regular basis to add new features and improvements based on learnings and feedback from our users. This support article describes what's new for each product release, with the newest release notes listed at the top. The ...